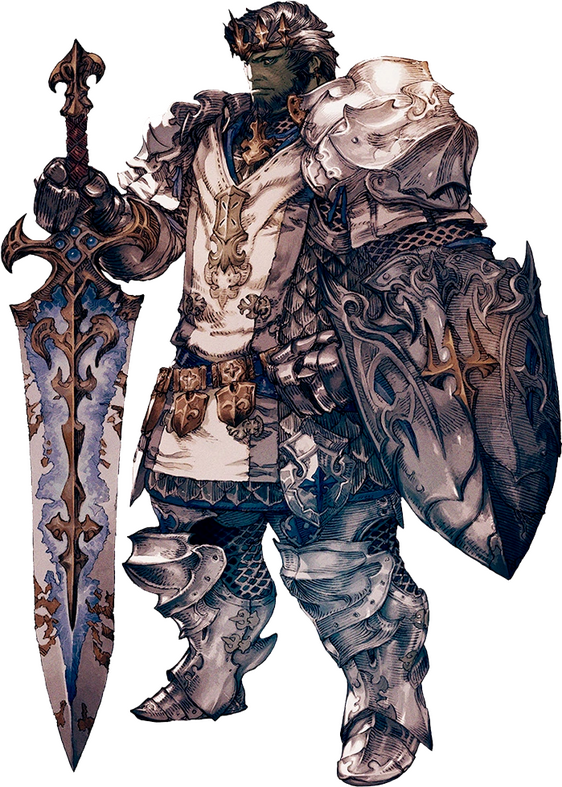
Paladin

Pros

  • Enables in-combat Elixir reset for allies

  • Incredible team fight control

  • Great survivability

  • Powerful stun

Cons

  • Lowest damage output

  • Highly vulnerable to cleave

  • Heavily affected by server tick

  • Can be killed during LB activation

Playstyle(s):

Guardian Angel:

This playstyle is particularly useful against enemy teams that are quickly able to ensure kills.

  • Paladins have the ability to completely nullify a kill with their Guardian+Guard combo & your goal in this playstyle is to keep distance & stay alive until you need to swoop in to save an ally with your Guardian. Before an engagement begins, move back to create some distance. You don't need to take unnecessary cleave damage.

  • In this role you're able to keep an eye out for potential enemy LB's, assist in focusing down kill targets with your Confiteor & charging in to help finish off with a shield bash.

  • Do NOT stay in the midst of the fight for too long after you do engage. Your health, MP & defensive ability cooldowns are necessary for ensuring a successful cover. Unless the match requires you to hold the point you should disengage & use your Elixir whenever possible.

Crystal Centric:

This playstyle is particularly useful against slow-burn teamfights where you're not often in direct danger.

  • While Paladins are best utilized for their covers, their staying power is not to be ignored either due to the Slow associated with their Holy Sheltron, low cooldown stun with their Shield Bash & their health recovery with each Royal Authority, particularly when combined with Confiteor.

  • In this role you will focus on surviving while contesting/moving the Crystal & stunning or using Confiteor on kill targets where useful.

  • While holding your ground is important, just as with the Guardian Angel playstyle, you still need to retreat & Elixir wherever possible. It's essential to learn when to swap between the two styles of play.

Basics

General:

  • Use Confiteor on kill targets, ideally into groups of enemies. The debuff left on enemies heals your teammates when they attack the target.

  • Ensure kills on low-hp targets by charging into Shield Bash.

  • Never stay in the teamfight for long unless you have to or are not being attacked.

  • Some players do not know they can Elixir while covered, try and learn who can & who cannot Elixir.

  • Try to use your LB blade combo on a single target where possible for maximum damage

Opener:

  • Try to use a Confiteor on the kill target & keep your distance. Holy Sheltron if you think the enemies will dive you.

  • Prepare to cover any teammate out in the open. If the enemy team dives them and they haven't guarded, chances are that you will need to Guardian them.

  • In most cases you should never charge in first but against low damage teams you can so long as you guard fast & early. Ensure that you Elixir so that you'll be able to Guardian+Guard when they're off Cooldown.

Mid-Game:

  • Be the relief for your teammates with cover but try to stay out of direct melee combat unless you're helping to ensure kills or you've won a teamfight and are cleaning up the enemy.

  • Keep and eye out for enemy LB's or general heavy damage. You'll need to use your own LB shortly before to ensure your allies are best protected.

  • Don't be scared to push the crystal outside of teamfights or engage to ensure kills. Your damage is low but your utility is still needed to win.

End-Game:

You're not safe until you've won.

  • In a winning fight, stick around and Shield Bash enemies coming out of guard. Try to find time to leave & Elixir when low just in case

  • In a losing fight, stay back and follow the Guardian Angel playstyle. Do not engage for too long if at all possible as your LB is often what wins an overtime game

Advanced

General:

  • A well timed Holy Sheltron can be used to save you from some LB’s such as Samurai

  • Use charge/intervene for extra damage between attacks during post-teamfight cleanup

  • Use Confiteor before your LB's blade combo on your target for extra damage

Cover/Guardian:

  • Distance yourself from your cover target so that you can break off as soon as possible

  • Guardian is tethered by distance & is unaffected LOS, you can wrap around pillars in Guard for a little extra safety.

  • Holy Sheltron just before guard ends if you're going to take damage

  • Don't feel pressured to cover immediately after your LB if your team isn't in immediate danger.

  • While Guard is usually required with cover, it's not always necessary with situations such as saving a low hp ally in your backline from a pursuing ninja being more than manageable with a Holy Sheltron in most cases.

How to Counter

  • Target the Paladin first and force them to Guard, this prevents them from Covering until Guard or LB is ready

  • Once a Paladin has used their cover they are extremely vulnerable & should be focused as the target priority.

  • AOE deals significantly more damage to a paladin when they're next to their cover target.

  • Roots, binds & silences prevent paladins from covering targets.

  • Monk, Reaper & Ninja LB's are a significant threat to their cover.

Regardless of Cover or Guard Status:

  • Chase down Paladins that attempt to escape the team fight where possible.

  • A paladin that cannot escape a team fight will never be able to safely utilize their kit.

Author: Anonymous Saint

Warrior

Pros

  • Lorem Ipsum

Cons

  • Lorem Ipsum

Playstyle(s):

Team Fight Focused:

  • Lorem Ipsum

Rat Focused:

  • Lorem Ipsum

Basics

General:

  • Lorem Ipsum

Opener:

  • Lorem Ipsum

Mid-Game:

  • Lorem Ipsum

End-Game:

  • Lorem Ipsum

__Advanced __

General:

  • Lorem Ipsum

Opener:

  • Lorem Ipsum

Mid-Game:

  • Lorem Ipsum

End-Game:

  • Lorem Ipsum

How to Counter

  • Hit em hard

  • Hitem Fast

  • Lorem ipsum

Author: Credit Where It's Due

Dark Knight

Pros

  • Lorem Ipsum

Cons

  • Lorem Ipsum

Playstyle(s):

Team Fight Focused:

  • Lorem Ipsum

Rat Focused:

  • Lorem Ipsum

Basics

General:

  • Lorem Ipsum

Opener:

  • Lorem Ipsum

Mid-Game:

  • Lorem Ipsum

End-Game:

  • Lorem Ipsum

Advanced

General:

  • Lorem Ipsum

Opener:

  • Lorem Ipsum

Mid-Game:

  • Lorem Ipsum

End-Game:

  • Lorem Ipsum

How to Counter

  • Hit em hard

  • Hitem Fast

  • Lorem ipsum

Author: Credit Where It's Due

Gunbreaker

Pros

  • The core mechanic, Draw and Junction, allows the GNB to react to the situation by changing between a focus on tanking, dps, or assisting with team healing

  • DPS can out-dps actual DPS jobs frequently

  • Incredibly strong in casual and lower rankings

  • One of the fastest-generating LBs

Cons

  • Junction entirely dependent on enemy team comp, no tanks means you can’t be a tank

  • LB very simple to avoid or be shut down by alert enemies

  • Can be quite squishy when not in tank junction

  • High skill floor to be used well

  • No cc outside of LB

Playstyle(s):

Push that Crystal:

  • If GNB can get Tank junction it has the strongest and longest mitigation of any tank

  • This mitigation also does damage back to opponents who hit the GNB, which can often add up in ways attackers don’t consider

  • It can also get a +20% to healing equating to the impact of an extra recuperate

  • If Tank isn’t available Healing junction can provide decent survivability

  • Healing junction provides low but steady healing to teammates around you which adds up in a long team fight on the crystal

  • GNB LB hits an area about the size of the crystal’s circle so it can create excellent zoning forcing enemies to retreat or die

No Survivors:

  • GNB’s high burst and survivability when not being the sole focus of an enemy team makes it excellent at chasing and finishing low enemies

  • GNB can exert a lot of pressure that keeps the enemy team from reorganizing or elixiring to return to the fight

  • If the GNB isn’t absolutely needed on the crystal this can be quite an effective strategy

Ability Overview:

Draw and Junction:

As mentioned GNB revolves around its ability Draw and Junction (Junction) which has a 25-yalm range and changes depending on the role of the enemy you use it on, Tank, Healer, or DPS, which does 3 things:

  1. Change your “Junctioned Cast” ability into one of three abilities (all are off GCD (oGCD):

  • Tank: Nebula: Reduces damage taken by 20% and delivers an attack with a potency of 4,000 every time you suffer damage. Duration: 10s.

  • DPS: Blasting Zone: Delivers an attack with a potency of 10,000.

  • Healer: Aurora: Restores own or target party member's HP. Cure Potency: 12,000. Additional Effect: Regen. Cure Potency: 3,000. Duration: 12s.

Junction has a 20-second CD, the Junction Casts all share a 20-second CD, you can use a Junction Cast and then swap to another junction while maintaining the buff if you used Nebula or Aurora

  1. Your Gnashing Fang combo will activate your Continuation combo as an oGCD that can follow-up with the main ability:

  • Each of these Continuation abilities have a bonus effect that depends on the role you have junctioned: Tank will generate shields for yourself, DPS will cause it to hit harder, and Healer will heal yourself and those around you

  • The Gnashing Fang combo all use the same hotbar button as Gnashing Fang, and hit for 5->6->7k regardless of your Junction

  • The Continuation abilities all use the same hotbar button as Continuation and hit baseline 1-2-3k and are oGCD meaning you can immediately follow Gnashing Fang combo with its corresponding Continuation.

  • Continuation effects are as follows:

  • Tank: base potency damage, generates a 4-> 5-> 6k shield for self

  • DPS: raises base potency damage to 3-> 4-> 5k (this raises the combo’s overall damage to 8-> 10-> 12k which is very good base damage)

  • Healer: base potency damage, heals for 2-> 3-> 4k in a 15-yalm radius

  1. Grant Burst Strike in place of your basic weapon combo, and effect its continuation Hypervelocity

  • Burst Strike hits for 7k and can be used for 10 seconds after using Junction on any role or if you complete all three strikes of your basic combo

  • Hypervelocity hits for 3k baseline and like the other Continuations Tank Junction grants 6k shield, DPS Junction raises potency to 5k, Healer Junction heals 4k, all oGCD to follow-up the burst strike

  • Don’t drop Burst Strikes! The buff only lasts for 10s so it should be prioritized over the Gnashing Fang combo.

With all that said, you primarily want to be using your Gnashing Fang combo and your Continuations for their effects and superior damage.

  • If you use your basic weapon combo in between your Gnashing Fang combo it will cause it to reset and waste it

  • Using Burst Strike and Hypervelocity will not interrupt your combo

  • Your Gnashing Fang combo has a 15-second cd, each step of the combo gives you a 5s buff that lets you use its respective Continuation oGCD, if you fail to do this it will drop off. The Gnashing Fang combo has its own 30s combo timer. Only your basic auto-combo will break your Gnashing Fang combo.

  • On a dummy you can quickly work through the combo but in practice with targets moving, GCDs going to Recuperates, Double Downs, etc. you’ll rarely work through the Gnashing Fang combo so quickly you’ll have time to fill with the basic combo basic attacks

  • Do not let your Gnashing Fang combo drop to the best of your ability!

Double Down:

  • Double down does a 12k AoE underneath the GNB, it has no correlation to your target’s location

  • Make sure you’re actually on top of your target or within a step of them when you use it as it’s a 5-yalm radius, same as your LB’s radius.

Rough Divide:

Rushes to the target, hits for 2k, and grants a buff (No Mercy) that increases damage dealt and healing you do by 20% and increases your movement speed by 25%, it’s a 7-second buff with 2 charges and a 15 second CD.

  • Each No Mercy lasts ~3 GCDs. To maximize value, don’t overwrite No Mercy early

  • Skill priority for No Mercy is approximately as follows:

  • Relentless Rush = Terminal Trigger > Double Down > Blasting Zone > ALL Continuations > Burst Strike = Wicked Talon > Savage Claw > Gnashing Fang >>>>>>>>>> Auto-combo

  • Nebula’s DPS output can also benefit from the No Mercy buff, but that’s contingent on you taking damage during it.

  • Whenever possible, you should try to heal (Recuperate/Aurora) within NM windows to improve your MP economy and survivability.

  • If you’re out of Rough Divide charges, consider holding LB/DD/BZ until you have one again. (though ideally, you should be holding a charge of Rough Divide for an imminent LB instead.)

  • In order to maintain uptime on a fleeing target without overwriting NM, you should position yourself in advance to be ahead of where they’re trying to go.

Limit Break: Relentless Rush and Terminal Trigger

  • Relentless Rush charges in 60 seconds.

  • You spin like a beyblade for 4 seconds, dealing 4k potency and applying a 4% stacking vulnerability up and a 4% stacking damage down on anyone hit. You take 25% less damage during this.

  • Terminal Trigger: This can be activated one second after you use Relentless Rush to trigger it early or it will automatically occur at the end of your spinning after 4 seconds. It deals 12k damage around you and stun targets for 3 seconds.

  • Most of the value of your LB comes from the damage and stun in Terminal Trigger, so 99% of the time, you should hit TT ASAP.

  • WHEN IN DOUBT, TERMINAL TRIGGER.

Advanced

If you’ve made it through Abilities then you should understand by now that there’s a lot going on with GNB. Most of it will boil down to the situation you’re in and what the enemy team comp will allow you to do. There is no Basics section to this guide because GNB really only starts at Advanced play levels.

Opening:

If you’re the only tank on your team, you want to prioritize survival in the opener as you’re the likely kill target:

  • If the enemy team has a tank, get yourself Tank Junction

  • You can either use Nebula on engage, or engage, guard, and then use Nebula after the enemies have hopefully wasted burst into your guard
    (the second is safer)

  • As a tank you’ll want to follow the typical Tank opening strategy of absorbing as much enemy burst as you can without dying, and running away to Elixir as you run out of mana.

  • Exceptions, of course, if your team is slaughtering the enemies to the point you don’t need to retreat.

Alternatively (by choice or because the enemy has no tanks)

  • You can take DPS junction in the opening and use your near-instant ~26k burst (RD>DD>BZ) to get a quick pick on the first vulnerable target.

  • Just be wary of counter-burst by the enemy team.

  • The more tanks/melees you have frontlining with you, the safer this opener becomes.

After the Opening:

Whether you hug the crystal as the pillar of your team or dive to stop elixirs and finish off enemies will depend on the match’s flow.

  • After the opening, if you’re not being harassed, switching to DPS junction may be the move, but be careful as the enemies might swap to burst you.

  • In a match where you’re hugging the crystal you may spend more time in Nebula than not.

Generally speaking, you either want to absorb the enemy’s resources in an even fight, or snowball off positive tempo with DPS junction. Generally, Tank Junction is preferable in neutral and disadvantaged fights, DPS Junction is preferable in advantagious fight advantage, and healer junction is useful only when fighting into AOE bleed/MP burn (like SCH) or against an enemy that is trickle-stalling near their spawn.

  • Tank Junction is preferable in neutral and disadvantaged fights

  • DPS Junction is preferable in advantageous fights

  • Healer Junction is useful only when fighting into AOE bleed/MP burn (like SCH) or against an enemy that is trickle-stalling near their spawn

Limit Break

Executing LB:

GNB is incredibly fun at low ranks because people simply don’t defend against its LB and position on top of one another. You can easily score double, triples, and quad kills. This becomes much harder at higher matchmaking levels where enemies are more alert. To best use your LB you need to consider the following:

  • How many enemies have Guard?
    (Starting it on a Guarding enemy right before it finishes is not a bad idea if they can’t escape)

  • Are there un-purifiable ccs that might ruin your LB like WHM’s Miracle of Nature or Monk’s Enlightenment

  • Do you have Double Down up, Rough Divide, and ideally DPS Junction’s Blasting Zone?

Doing it Right

  • Ideally to make sure you get your LB off you cant to have someone cc you, then use Purify and launch into your LB

  • If you’ve just purged a cc with purify you get 5 seconds of immunity where only knockbacks, draw-ins, Miracle of Nature, DNC and RPR LBs can affect you

  • Alternatively, if you have a melee engage partner, you can have them soak the cc for you and then dive in and RR/TT after the enemy has burned those resources.

  • After this, activate Terminal Trigger ASAP (It will always inflict 2 stacks minimum.)

  • Your LB’s greatest use is the 12k damage + 3-second stun, not the vulnerability debuff

  • After executing Terminal Trigger you want to use Double Down and Blasting Zone if you have it

  • Do this and you’ll have AoE’d those around you for at least 24k, and hit one target for 34k. This rises to 28.4k with Rough Divide, and 40.4k for the single target

Alternatively

  • If you expect to be focused during your LB, you can pre-pop Nebula

  • Combined, RR and Nebula will give you 40% mitigation, plus the additional mitigation from inflicted Shrapnel stacks

  • While it’s always ideal to use your LB to burst and kill, it also has considerable stalling power if channeled for its full duration

This LB sounds great for trying for multi-kills but you shouldn’t hesitate to do this to single targets either. Since the LB is one of the shortest and can almost guarantee a kill if executed right, you can get your team that first kill which can then trigger a snowball to victory.


A Note About Being cc’d While LBing

Even if you’re hit with something like Meteodive or Miracle of Nature that causes complete loss of control, your LB will continue. If you can’t activate the trigger yourself, it will activate for you at the end no matter what. This can look a little janky because you might not see your character doing the animation, but know that you are doing the LB and should still position on top of an enemy if you can.(It’s worth noting that the 1s GCD delay is not present when RR times out and TT activates automatically, allowing you to DD marginally faster. It’s not worth channeling RR for this, but it’s still good to know.)

How to Counter

A problem for Gunbreaker is that there’s a fair amount of counterplay that can reduce its effectiveness.

  • Cc them when they’re LBing to prevent them from being able to execute Terminal Trigger early

  • Knockbacks are particularly effective since even purify doesn’t stop knockback effects

  • Spread out so they can’t cleave multiple people with their LB and double down

  • If the GNB telegraphs an impending LB by diving at you with LB active, hit sprint and just run, you can escape the AoE before it goes off. You can bind the GNB to help escape.

  • Generally speaking, all cc is always a problem for GNB, since it gets so much value from uptime.

Outside of LB GNB is usually fairly susceptible to cc and kiting, forcing them to burn their Rough Divide charges can reduce their survivability and threat potential. Watch for Nebula though and simply hit someone else during this time if your team is smart.Lastly, if you have no tank on your team, then you know the GNB has no real mitigation and is just a high-HP DPS. In this case I suggest killing them first since they’ll be both up in your face as a melee, but also because if left alone for a full minute their LB might win them the team fight if it’s still going.

Author: Verre Bellareve - Mateus

Contributor: Anonymous, Very Awesome Person #1